If you're in the market for screws and bolts, you know that installation quality is just as critical as the fasteners themselves. A perfectly machined screw or bolt means nothing if it's not secured properly-whether you're building a deck, assembling machinery, or putting together furniture. Over my years as a screws and bolts supplier, I've seen countless projects derail because of overlooked installation integrity checks. In this post, I'll walk you through practical, science-backed methods to test whether your screw or bolt installation is up to par, and how choosing the right fasteners for your job makes all the difference.
First, let's clarify what "installation integrity" actually means. It's not just whether the screw or bolt is tight-it's whether it's seated correctly, free from defects in the hole or the fastener, and capable of withstanding the forces it's designed to handle. Skipping these checks can lead to loose connections, material fatigue, or even structural failure. For example, a loose carriage bolt on a wooden deck can shift over time, creating safety hazards, while a poorly set set screw in a machine might cause parts to misalign and break.
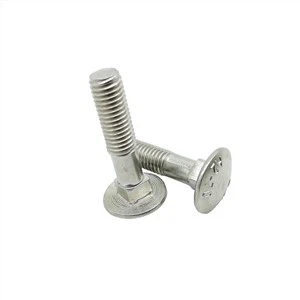
Let's start with the most basic visual and tactile checks-these are quick, no-tools-needed, and great for initial assessments. First, inspect the fastener's seat: for carriage bolts, the square neck is designed to prevent spinning as you tighten the nut, so a Stainless Steel Square Neck Carriage Bolts should sit flush with the wood (or metal) surface, with no gap between the bolt's head and the material. If there's a gap, the square neck might not have engaged properly in the pre-drilled hole, which means tightening further won't fix it-you'll need to adjust the hole size or use a different fastener. For Wafer Head Drilling Screw, the wafer head is wide and thin, designed to spread load on thin materials like sheet metal or plastic. If you notice the head isn't sitting flat against the material, it could be a sign of over-tightening (which can crack the material) or under-tightening (which leaves the screw prone to pulling out).
Next, tactile testing: grab the fastener with a wrench or pliers (if it's accessible) and gently try to turn it. If it spins easily, that's a red flag-especially for set screws, which are meant to clamp onto a shaft to hold a pulley or gear in place. A Slotted Hex Socket Set Screw With Flat Point should grip the shaft firmly; if it spins without resistance, it might have been tightened too little, or the flat point is worn down. For DIN603 Zinc Plated Class8.8 M6M8M10M12 Carriage Bolts, spinning means the square neck didn't engage, so the entire connection is unstable. But don't overdo the force here-you don't want to damage the fastener or the material. A gentle test is enough to catch obvious looseness.
Once you've done the initial checks, move to more rigorous torque testing, which is the industry standard for measuring how much force is applied to a fastener. Torque is the rotational force used to tighten bolts and screws, and every fastener is designed to withstand a specific range of torque. For example, a Class8.8 bolt (like those in the DIN603 Zinc Plated line) has a minimum tensile strength of 800 MPa, so its recommended torque values are published in industry standards like ISO 898-1. Using a torque wrench, you can apply the specified torque to the fastener and check two things: first, if the fastener reaches the target torque (meaning it's tightened correctly), and second, if it doesn't exceed it (which can cause the bolt to stretch or break).
Here's where many people go wrong: over-torquing. For set screws, too much torque can deform the screw's point or the shaft it's gripping, leading to reduced clamping force. For Wafer Head Drilling Screws, over-torquing can strip the threads in the material or crack the wafer head. Under-torquing, of course, leads to the same issues as a loose fastener-components shifting over time. I always tell customers to cross-reference the fastener's material and size with a reliable torque chart, but if you're not sure, our team as a screws and bolts supplier can help you find the right specifications for your project.
Another key test is tension testing, which checks if the fastener is stretched to its intended load. When you tighten a bolt, it stretches like a spring, creating clamping force that holds the materials together. Tension testing is more advanced than torque testing-you need specialized tools like a bolt tension tester or ultrasonic sensor. These tools measure how much the bolt has stretched, which is a direct indicator of the clamping force. For critical applications like bridge construction or heavy machinery, tension testing is non-negotiable because torque can be affected by factors like friction between threads, lubrication, and the condition of the nut. For example, if a bolt's threads are dirty or corroded, the same torque will result in less tension than if the threads are clean. That's why using high-quality fasteners like Alloy Steel Cup Point Set Screws (known for their excellent tensile strength) matters-they're designed to handle the tension without failing.
Don't forget to check the hole and material compatibility, because even a perfect fastener installation can fail if the hole is wrong. For screws, the hole size is crucial: a hole that's too small can cause the screw to bind, leading to over-tightening, while a hole that's too large can cause the screw to strip or pull out. For example, when installing a Wafer Head Drilling Screw into metal, you need to use a self-centering drill bit to ensure the hole is aligned-if the hole is off-center, the screw's threads won't engage properly, reducing holding power. For carriage bolts, the square hole (not round) is required for the square neck to lock in place; if you drill a round hole, the bolt will spin when you tighten the nut, making the entire installation unstable.
I've seen this firsthand with a customer who installed Stainless Steel Square Neck Carriage Bolts on a patio deck. They drilled round holes instead of square ones, and within a month, the bolts were loose and the deck boards were shifting. The issue wasn't the bolt quality-it was the hole preparation. That's why part of testing installation integrity is checking the hole to make sure it matches the fastener's design.
For set screws, a different type of test is point engagement. A Slotted Hex Socket Set Screw With Flat Point is designed to press against a flat surface, while an Alloy Steel Cup Point Set Screws has a conical point that digs into a round shaft. If the point doesn't engage correctly-for example, a flat point on a round shaft-it won't create enough clamping force to hold the part in place. To test this, you can remove the set screw, inspect the point, and check if it matches the shaft's surface. If the cup point isn't digging into the shaft, you might need to use a larger set screw or a different point type.
Environmental testing is another consideration, especially for outdoor or high-humidity applications. Fasteners can corrode over time, which weakens them and reduces installation integrity. A DIN603 Zinc Plated bolt is coated to resist corrosion, but if the coating is scratched during installation, the metal underneath can rust, leading to reduced strength. To test corrosion resistance, you can perform a salt spray test (standardized in ASTM B117) where you expose the fastener to a salt solution for a set period and check for rust. While this is more common in industrial settings, it's a good idea for outdoor projects like fences or outdoor furniture.
Now, let's tie this back to why choosing the right screws and bolts from a reputable supplier matters. A low-quality fastener might not have the tensile strength to withstand tension testing, or its threads might strip during installation. At our screws and bolts store, we stock a range of fasteners designed for different applications: from the versatile Wafer Head Drilling Screw for thin materials, to the durable DIN603 Zinc Plated Carriage Bolts for wood and metal structures, to precision set screws for machinery. We also provide technical support to help you choose the right fastener and installation methods for your project, so you don't have to guess about torque or hole size.


One common mistake I see is people using the same torque value for all fasteners. A small M6 set screw needs less torque than a large M12 carriage bolt, and mixing these up can lead to failure. For example, if you apply too much torque to a Slotted Hex Socket Set Screw With Flat Point, you can break the screw's head or deform its point. If you apply too little, it won't grip the shaft. That's why our team works with customers to provide specific torque guidelines based on the fastener's material, size, and application.
When you're finished with your installation, take a step back and re-test after a few days or a week. Some materials (like wood) can shift as they settle, which can loosen fasteners. Go through the same checks: visual inspection for gaps, tactile testing for looseness, and if possible, a quick torque check to make sure the fastener hasn't moved. This post-installation test is crucial because it catches issues that might not be obvious right away.
Let's summarize the key steps to test screw or bolt installation integrity, so you have a clear checklist:
- Visual Inspection: Check for flush seating, correct hole preparation, and no defects in the fastener's head or threads. For carriage bolts, confirm the square neck is engaged; for wafer head screws, ensure the head sits flat; for set screws, verify the point matches the shaft surface.
- Tactile Testing: Gently try to turn the fastener. It should be tight-if it spins, the installation is unstable.
- Torque Testing: Use a calibrated torque wrench to apply the manufacturer's recommended torque. Ensure you hit the target without over-tightening, which can damage the fastener or material.
- Tension Testing: For critical applications, use specialized tools to measure bolt stretch, which ensures the clamping force is correct.
- Compatibility Check: Confirm the fastener is designed for your material (e.g., self-drilling screws for metal, stainless steel for outdoor use).
- Post-Installation Re-Check: Test again after a short period to catch shifting materials or loosened fasteners.
At the end of the day, testing installation integrity isn't just about avoiding mistakes-it's about ensuring your project is safe and long-lasting. Whether you're a DIY homeowner working on a deck or a manufacturer building heavy machinery, the right fasteners and proper testing go hand in hand. If you're not sure which fastener is right for your project, or if you need technical guidance on testing, reach out to our team as a screws and bolts supplier. We're here to help you choose the right products and ensure your installations are secure.